Friday, September 08, 2006

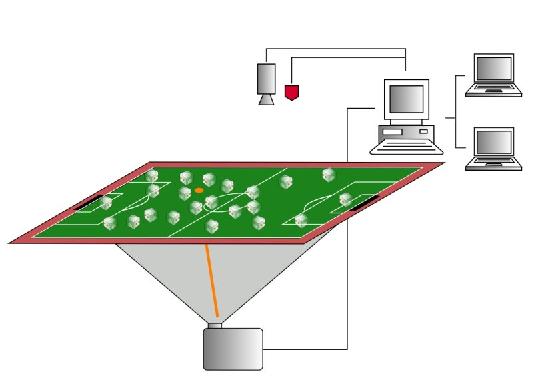
GTP-USB-Lite Programmer (again)

Inspired by the student-unfriendly serial port based PIC programmer provided by the school, I have once again embarked on the journey of making a USB based PIC programmer. From experience, the best free and simple USB based PIC programmer is still the GTP-USB-Lite Programmer, which has been featured here before. LINK


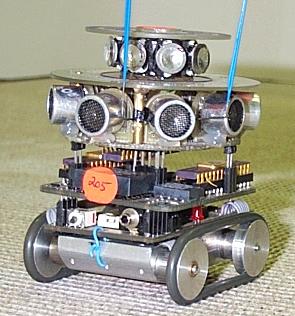
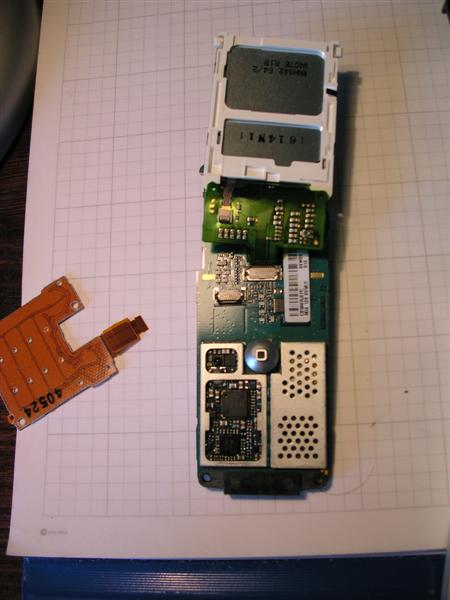
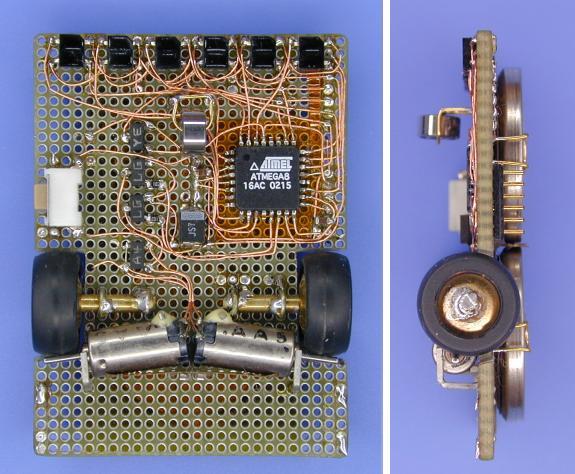
The GTP-USB-Lite Programmer.


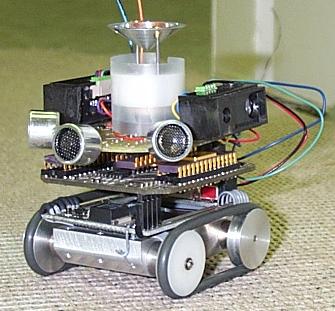
Plugged into the laptop via USB.

Today, I will share with you my PCB version of this GTP-USB-Lite Programmer. You may like to download the following files and start making one immediately:

Download:
> Programmer Schematic
> Programmer PCB Design
> Programmer PCB Design Component Layout
> Programmer PCB Design Component Layout with Tracks

> Firmware for 18F2550 chip (aka: the HEX file)
> winXP driver
> PC side software: WinPic800 (v3.55b) (MUST use this version)


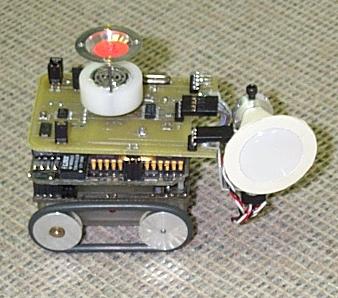
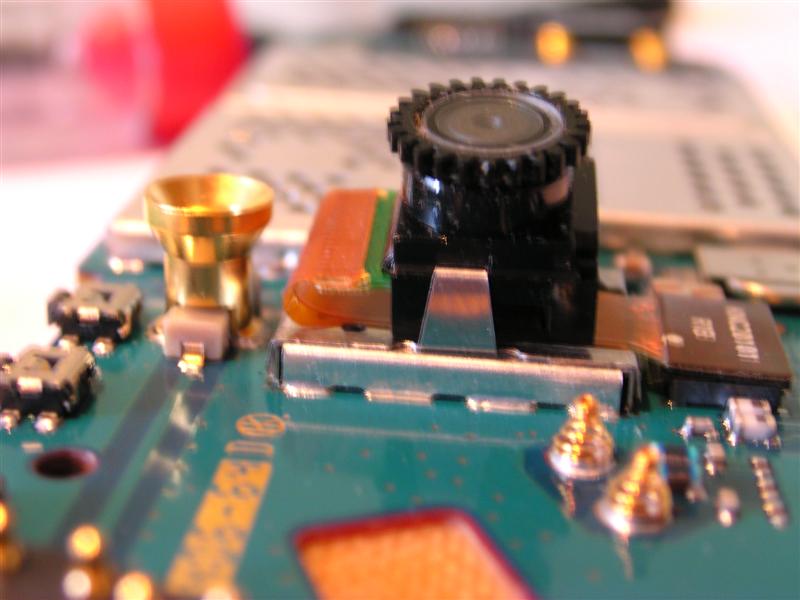
The solder side of the PCB.
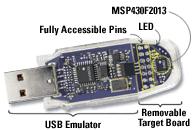

Components:
Except for the onboard controller PIC18F2550, the rest of the components are very commonly available. So now the bottleneck is the 18F2550 chip. But this can be obtained from Microchip by ordering its samples =) which means that this USB programmer can be made at ultra low cost!

Trick:
Please make sure you have a working PIC programmer (or you have a good friend) to flash in the HEX file into the 18F2550 for the 1st time. (one time operation). This is because the 18F2550 needs the program in the HEX file in order to perform like a programmer.

If you are observant enough, you will see a 100nF capacitor next to the target PIC’s socket. Without this, the programmer can only perform read operations but not the write operations. Quite a number of enthusiast had emailed me telling me that their programmer is not working despite having the best debugging efforts. This may be the remedy =)

Installation Procedures:

1. Download PC side software: WinPic800 (v3.55b) and make sure you know where you had saved it.

2. Plug in your newly constructed programmer into the USB port. *make sure the 18F2550 on your programmer has already been flashed with firmware (the HEX file)!* Else nothing will happen.

If everything is right (nothing wrong with your circuit), you should see the following screen popping up:


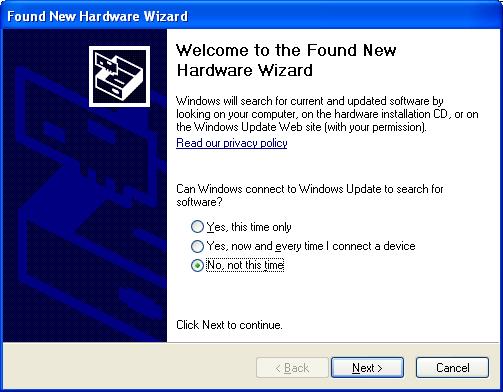
Select "No, no this time", click "Next"

3. Next, the following screen will pop up.


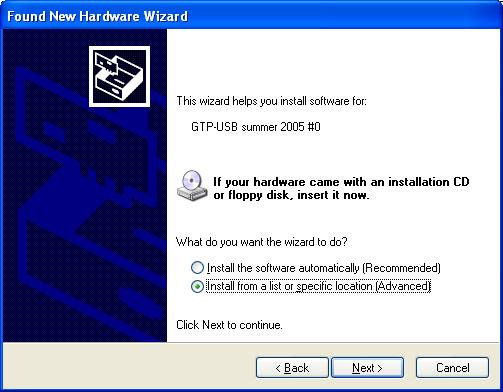
Select "Install from a list or specific location (Advanced)" , click "Next"

4. When prompted for the driver, browse for the location where you had previously saved the downloaded file WinPic800 (v3.55b) Look for the folder named "winXP Driver". Select that.


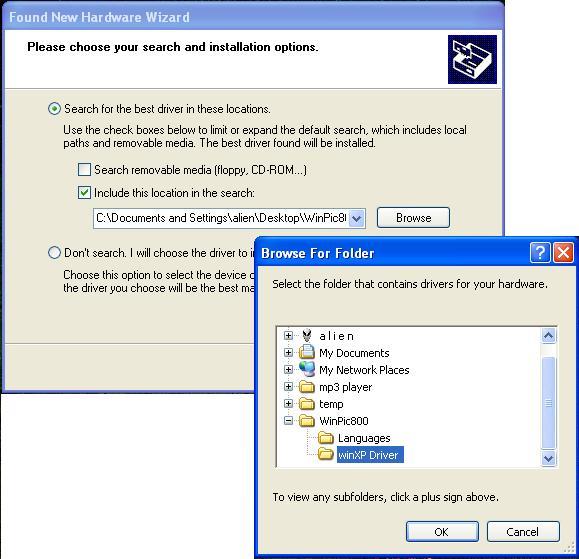
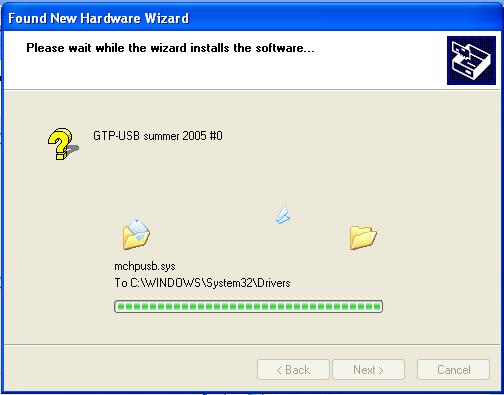
Computer will start driver installation after you click next.


Wola! Done =)

To test if your programmer is working:


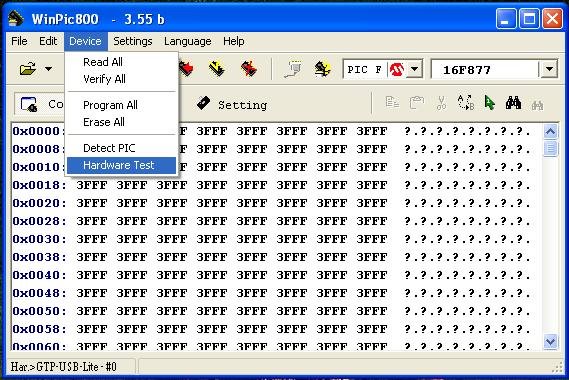
Device > Hardware Test
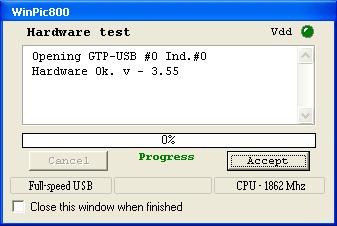

Hardware OK!


16F877 detected! cool~

Have fun! =)

Friday, July 21, 2006

Photo Recovery Software (freeware!)

Anyone out there with damaged, accidentally deleted by kids, half killed by virus, don't fret! This software *might* be able to get some life out of it.

During my last expedition to Mt Kinabalu, I went to a photo developing shop in Centerpoint, Kota Kinabalu (a shopping mall in Kinabalu town). I was intending to let them print out some of my photos taken using my digital camera, with xD card as storage medium.

My xD card was inserted into their card reader, connected to a winXP machine. When I look into the contents of the xD card, a mysterious file was found! Oh no! Virus! When I try to access my photos, a large number of them cannot be opened! When inserted back into the camera, camera prompted me to FORMAT this uninitialised card. This is the most terrible thing that can ever happen to any digital photographer - picture loss!

Without any trust-able computers around (I did not bring my laptop along) I dare not start any rescue operation. Everything must be keep intact till I reach home. For the next few days, I was left camera-less (I only have 1 xD card =x)

As soon as I reach home, the 1st thing to do is to start rescue operation. Many photo rescue software surfaced but almost all wants to share my wallet. Only this one offers to help me for free!

LINK: Free Art Plus Digital Photo Recovery


This software goes to every corner of my xD card and attempts to make picture sense out of it. After a not-so-long wait, my photos are back again!


If your camera / memory card reader / drive is connected, it will be shown on the top scroll down options.


This explains why is Art Plus Digital Photo Recovery free for everyone to use, unlike other recovery software.

Download it at download.com: LINK

No doubt such software is available, don't try to push your luck too far. The best advice is not to endanger your precious set of photos on unknown computers, even if they resides in nice shops! Nobody will cry louder than you when your precious pictures are gone. =)

Sunday, June 18, 2006

Intel P4 2.66GHz

Helped a friend to build a new system =)


Intel Pentium 4, 2.66GHz

When will I fix one for myself? =)

Thursday, June 08, 2006

GM862 Cellular Module

This is a GSM module. All you need to do is to insert a SIM card (normal mobile phone SIM card) and vola! your project can communicate with the rest of the world via GSM network. This includes sending and receiving SMS, data calls, etc.


GM862 Cellular Module from Telit

This GM862 Cellular Module is controlled via AT commands. This means all you have to do is send a string of serial characters such as "ATD 1234567" and the module will place a call. Once the module has been connected, a serial connection is made and data can be transferred by sending and receiving serial strings through the module. It's just so easy!

You can download the datasheet HERE.
Where to get them: LINK

How about making a huge LED display hanging in the office that displays incoming SMS? ;p

Home Made Fuel Cell

Have you ever dream of making your own fuel cell?
Here is a detailed plan on how to make your own Band Aid Fuel Cell! (Band Aid, otherwise commonly known as Handy Plast) LINK


A Band Aid Fuel Cell at work. Taken from LINK

To support the research and making of fuel cell, there is this friendly online webstore that sells very useful materials: http://www.fuelcellstore.com/

In that online store, you can get a Platinum Fuel Cell too!


Platinum Fuel Cell at work, taken from LINK. Note the higher potential difference when compared to a normal fuel cell.

With the increase attention given to alternate energy sources, it's time for us to get our hands dirty; maybe by starting with fuel cell experiments?

How about making fuel cell powered toy cars? =)

Thursday, June 01, 2006

The Art of a Camera

This picture shows the interior of a Canon IXUS 50, taken from the Internet.


The mechanics and electronics of the camera is so nicely and neatly packed that I would say it's a nice piece of art.

Sometimes, it is good to pause a while and appreciate the "art pieces" around us =)

Tuesday, March 14, 2006

Reflow Soldering (BGA)

Q: How do enthusiast tackle the problem of using BGA components?

A: Use a Toaster Oven!

Here is a good site that teaches you how to use a Toaster Oven for Reflow Soldering: LINK

The basic idea is make absolute sure that your BGA component is nicely aligned to the PCB board, then use the heat of the oven to melt the solder balls, wait for it to cool, and wola~ the component has been nicely soldered onto the board.


This is ADXRS300, a 1 axis Gyrometer made by Analog Devices.


Since we are looking at the ADXRS300, might as well look at what this chip is for. DATASHEET

Take care not to over cook your components! ;p

Friday, March 10, 2006

Self Made MP3 Player

Build your own MP3 player, HERE

Thursday, March 09, 2006

Sonar Range Finder

Mini Sonar Range Finder, for your small robotic projects LINK


Features:
- 42kHz Ultrasonic sensor
- 20Hz reading rate
- RS232 Serial Output - 9600bps
- Analog Output - 10mV/inch
- PWM Output - 147uS/inch
- Low 2mA supply current
- Small, light weight module

Datasheet can be found HERE

Wednesday, March 08, 2006

Citizen Eco-Be!

The Eco-Be! is a mini robot which can be produced at very low cost, using Citizen's reowned knowledge in miniature devices and their well established watch technology. ]

LINK to the official Citizen Eco-Be! Website.


It really looks like a Zippo lighter.

The makers are intending play a game of soccer with these small robots! LINK They will be playing a demo run in RoboCup 2006.


This is the setup of the robot soccer. The camera on top has an overview of the entire playing field. The computers at the side will "play" the soccer game by deciding what to do next. It will "tell" the individual robots on the field what they should do. It is something like remote control robots, but now we have a computer remote controlling a team of robots.


One very interesting setup that I want to highlight here is the playing field - it is a 37" flat panel display!! Imagine robots running on this big flat panel. Ouch.. From the website's description, the soccer ball will be an image on the display!

With a display as the playing field, one can easily imagine changing the displayed images to simulate different scenario. You can have a team of real robots playing with a team of virtual robots that are images on the screen!

How about displaying an urban setup and have robots playing hide and seek? ;p

Tuesday, March 07, 2006

MSP430 USB Stick Development Tool

From Texas Instrument, the eZ430-F2013 is a powerful development tool that provides both the USB based programmer and F2013 development board in a small USB stick package. LINK


The flash memory can be erased and programmed in seconds, and since the MSP430 flash is extremely low power, no external power supply is required.

The tool has an integrated software environment and connects directly to the USB port of a PC which greatly simplifies the set-up and use of the tool. The flash development tool supports development with the MSP430F20x3 devices.


Some of it's cool specs
- 16 MIPS
- less than 1uA standby current
- fast 10-bit ADC to 16-bit sigma-delta with integrated PGA
and more!

Cost? 20USD Only! LINK

Is this the cheapest (and smallest) USB development kit that is available now? =p

Monday, March 06, 2006

SpokePOV

How about planting LEDs on the spokes of your bicycle wheels so that they give you animated images when you cycle?


A biohazard warning sign on display. Here are the instructions on how to make one! LINK

Step by Step instructions HERE


The software (written by the creater of the site above) that converts your desired image into a microcontroller usable data, which controls the on-off switching of the LEDs to give you the nice biohazard image. Taken from HERE.


The schematic of the gadget.


This is how it is being installed on the bike's wheel.

A new way to advertise/promote stuff while cycling with this gadget ;p

Sunday, March 05, 2006

A to D Conversion - The Image Processing Way

In today's world, almost everything is computerised. What can you do to the good old analog devices? How do you digitise your analog meters without having to install complicated sensors, or inserting probes into your existing plant?

Use a digital camera, dig into Image Processing!

Here is an interesting way of performing Analog to Digital conversion, extracted from HERE.


Old but highly reliable analog device.


Take a picture of the dial face. Digitising the reading, by capturing the image.


Perform edge extraction.


Do a Hough Transform to find the longest continuous line. That's you needle!

By using Matlab, (here is the CODE) the cartesean coordinates of the tip of the needle can be found easily, which can be converted to be the reading of the meter. Other software can do the job too, if you are proficient in it.

How about taking a picture of your analog clock and converting it to digital time? =p

Saturday, March 04, 2006

Millibots

The Millibot Project - research effort by Carnegie Mellon University (CMU), under the direction of Dr Pradeep Khosla, funded by Defense Advanced Research Projects Agency (DARPA).

These mini robots each has their own specific functions, and they are capable of collaborating to work for a bigger objective. These are pioneer prototypes of future unmanned war systems.

Imagine a swam of these robots going into unknown enemy grounds while human operators sit back in safe zone monitoring the situation as if they are playing an arcade game.

To let you have a feel of the size of these robots, here is a picture to let you compare it with a standard 9V rectangular battery.


Because it's small in size, it is possible to deploy a huge swam of them into an objective area. If a few of them "dies", it's ok. There are still a whole lot of them who are able to do the job.


The Sonar Robot.
It has a 8-element sonar array that is used to detect obstacles and produce maps. It is also capable of coordinating with other robots to perform robot to robot ranging, so as to keep track of team member location as the team moves.


The Long Range Sonar Robot.
It has a 8-element sonar array just like the short range module, but has some major improvements. It is also capable of robot to robot ranging and perform
localization.


The Digital Infrared Ranging Sensor (Dirrs) Robot.
It has 2 Dirrs modules on either side and is used mainly to follow walls and search for openings. It also has 3 sonar elements infront.


The Pyro Robot.
It has a sweeping pyro detector on the front that allows the robot to sweep the area for heat sources. It is sensitive enough to detect stationary warm bodies


The Color Camera Robot.
It has a small Color camera. This allows remote commander to peep at what is happening in that area of operation.


This is a MUST SEE video: Interview with Pradeep about the future of Millibot deployment. He talks about why are they looking at millibots, and he takes apart one immediately! LINK


This is a local media news coverage for millibots. Another MUST SEE! LINK

Some good Papers from this Project:


  • Grabowski, R., Khosla, P., "Localization Techniques for a Team of Small Robots" in Proceedings of the IEEE/RSJ International Conference on Intelligent Robots and Systems (IROS'01), Maui, Hawaii, October 29-November 3, 2001.
  • L.E. Navarro-Serment, R. Grabowski, C.J.J. Paredis, P.K. Khosla, "Modularity in Small Distributed Robots" in Proceedings of the SPIE conference on Sensor Fusion and Decentralized Control in Robotic Systems II, Boston, MA, September 19-22, 1999.

How about making a couple of them to roam around your house? ;p

Friday, March 03, 2006

DIY Laser Projector

When LED and LCD are no longer fun, go ahead and build this:


See the animated little red man on the screen? It's projected by laser!

This is an AVR controlled laser video projector, capable of 16x16, 20-30fps video.

Details are found here: http://heim.ifi.uio.no/haakoh/avr/


A normal laser pointer, shooting at a ring of 16 mirrors.

You can watch a video clip of it working HERE.

How about making a laser projected oscilliscope? ;p

Thursday, March 02, 2006

Chikinramen

something non technical.....


chikinramen doing morning exercises!

maybe this will encourage you to do some exercises instead of staring at the computer screen all day long... ;p

Wednesday, March 01, 2006

Disassemble T630

I love to take things apart to see what's beneath it, wonder how and why it works. Almost everything that I have has been taken apart before. Sometimes, it works after re-assemble. Sometimes, it doesn't. =x

Here is a guide that taught me how to disassemble a Sony Ericsson T630 with confidence. LINK

I am unable to take pictures of my disassembled T630 as I had sold my camera =x

Here are some pictures taken from that site:


Exposed T630


This is the mini camera module that is mounted on a T630.

Are you inspired by this to rip open your mobile phone? ;p

Tuesday, February 28, 2006

Tabletop Bug

How about having a robotic bug that runs around your desk?


This is a desktop line following robot, created by Elm Chan.
Click HERE to visit his site that has details about this robot


This robot is powered by 2 coin batteries, using an ATmega8 (Atmel) microcontroller with 6 photoreflectors as its "eyes". According to the maker, it weighs only 15g!

The robot uses PID (without the I) for its line following function! Cool!


Ideas are rolling.... how about drawing a black line leading straight to your boss desk, with an emoticon drawn on a yellow memo pad that is being sticked onto the back of this bug? ;p